Dvorak with the Kinesis Advantage360
This post shows how to program a Dvorak layout for the wired Kinesis Advantage360 by directly editing a layout file. Note that the (wireless) Advantage360 Professional uses a completely different configuration process, described here.
For many years now, my keyboard of choice has been a contoured Advantage keyboard from Kinesis with a Dvorak layout. Contoured keyboards make the home row a very comfortable position, and Dvorak places the most frequently used keys on the home row. The keystroke heatmaps below give an idea of the difference.
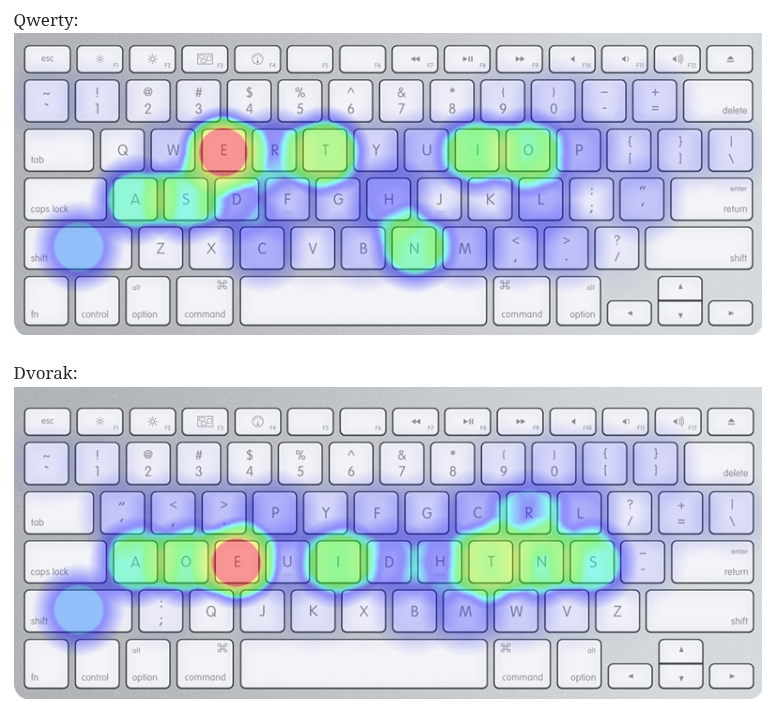 Image credit: Why You Should Try Dvorak
All Kinesis Advantage keyboards support key remapping. Earlier models (Advantage, Advantage2) made using Dvorak extremely easy: you could toggle the entire keyboard into Dvorak with a built-in key combination. It seems that option no longer exists on the Advantage360. Instead, you have three choices:
- Manually remap keys one by one on the keyboard
- Use the SmartSet application
- Edit the keyboard’s layout files directly
The SmartSet app only runs on Windows and macOS, and I’m using Linux. Manually remapping an entire layout sounds tedious. That leaves direct editing the layout files.
Editing the layout file
Kinesis documentation for the Advantage360 is spread across multiple manuals, which makes it harder than it should be to find the relevant information. The two documents you actually need are:
- SmartSet Direct Programming Guide - Describes how to access the layout files
- SmartSet Engine Supported Actions - Describes the layout file syntax
The basic process is:
- Hold the SmartSet key (the gear-shaped button next to the 6 key) and tap Hotkey 3.
- The indicator LEDs will flash four times.
- The keyboard exposes a USB drive while in this temporary programming state.
- The drive appears as ADV360.
- Edit a layout file, for example:
ADV360/layouts/layout1.txt- layout1.txt through layout9.txt are user-configurable profiles.
- Eject the ADV360 drive.
- Hold the SmartSet key and tap Hotkey 3 again to exit programming mode.
The keyboard reboots using the updated layout.
Creating a Dvorak layout
Each layout file has the following structure:
<base>

<keypad>

<function1>

<function2>

<function3>
For a standard typing layout, we’ll only edit the <base> section.
Remapping Syntax
Remaps and macros use a proprietary syntax. From the manual:
Remaps and macros are encoded in a layout file using a proprietary syntax. Each of the keys on the keyboard (other than the SmartSet Key) has been assigned a unique “Position” token used to identify that key for programming in either layer (see Position Token Map in Appendix A). Each keyboard & mouse action supported by the 360 has been assigned a unique “Action” token corresponding to a standard USB “scan code”.
- Each physical key has a position token (based on QWERTY key names).
- Each output is an action token corresponding to a USB scancode.
- Remaps use square brackets:
[position]>[action] - Keys are identified by QWERTY key names, not the character they produce.
Below is a standard Dvorak mapping.
<base>
[q]>[apos]
[w]>[comm]
[e]>[perd]
[r]>[p]
[t]>[y]
[y]>[f]
[u]>[g]
[i]>[c]
[o]>[r]
[p]>[l]
[obrk]>[fsls]
[cbrk]>[eql]

[a]>[a]
[s]>[o]
[d]>[e]
[f]>[u]
[g]>[i]
[h]>[d]
[j]>[h]
[k]>[t]
[l]>[n]
[scol]>[s]
[apos]>[hyph]

[z]>[scol]
[x]>[q]
[c]>[j]
[v]>[k]
[b]>[x]
[n]>[b]
[m]>[m]
[comm]>[w]
[perd]>[v]
[fsls]>[z]

<keypad>

<function1>

<function2>

<function3>
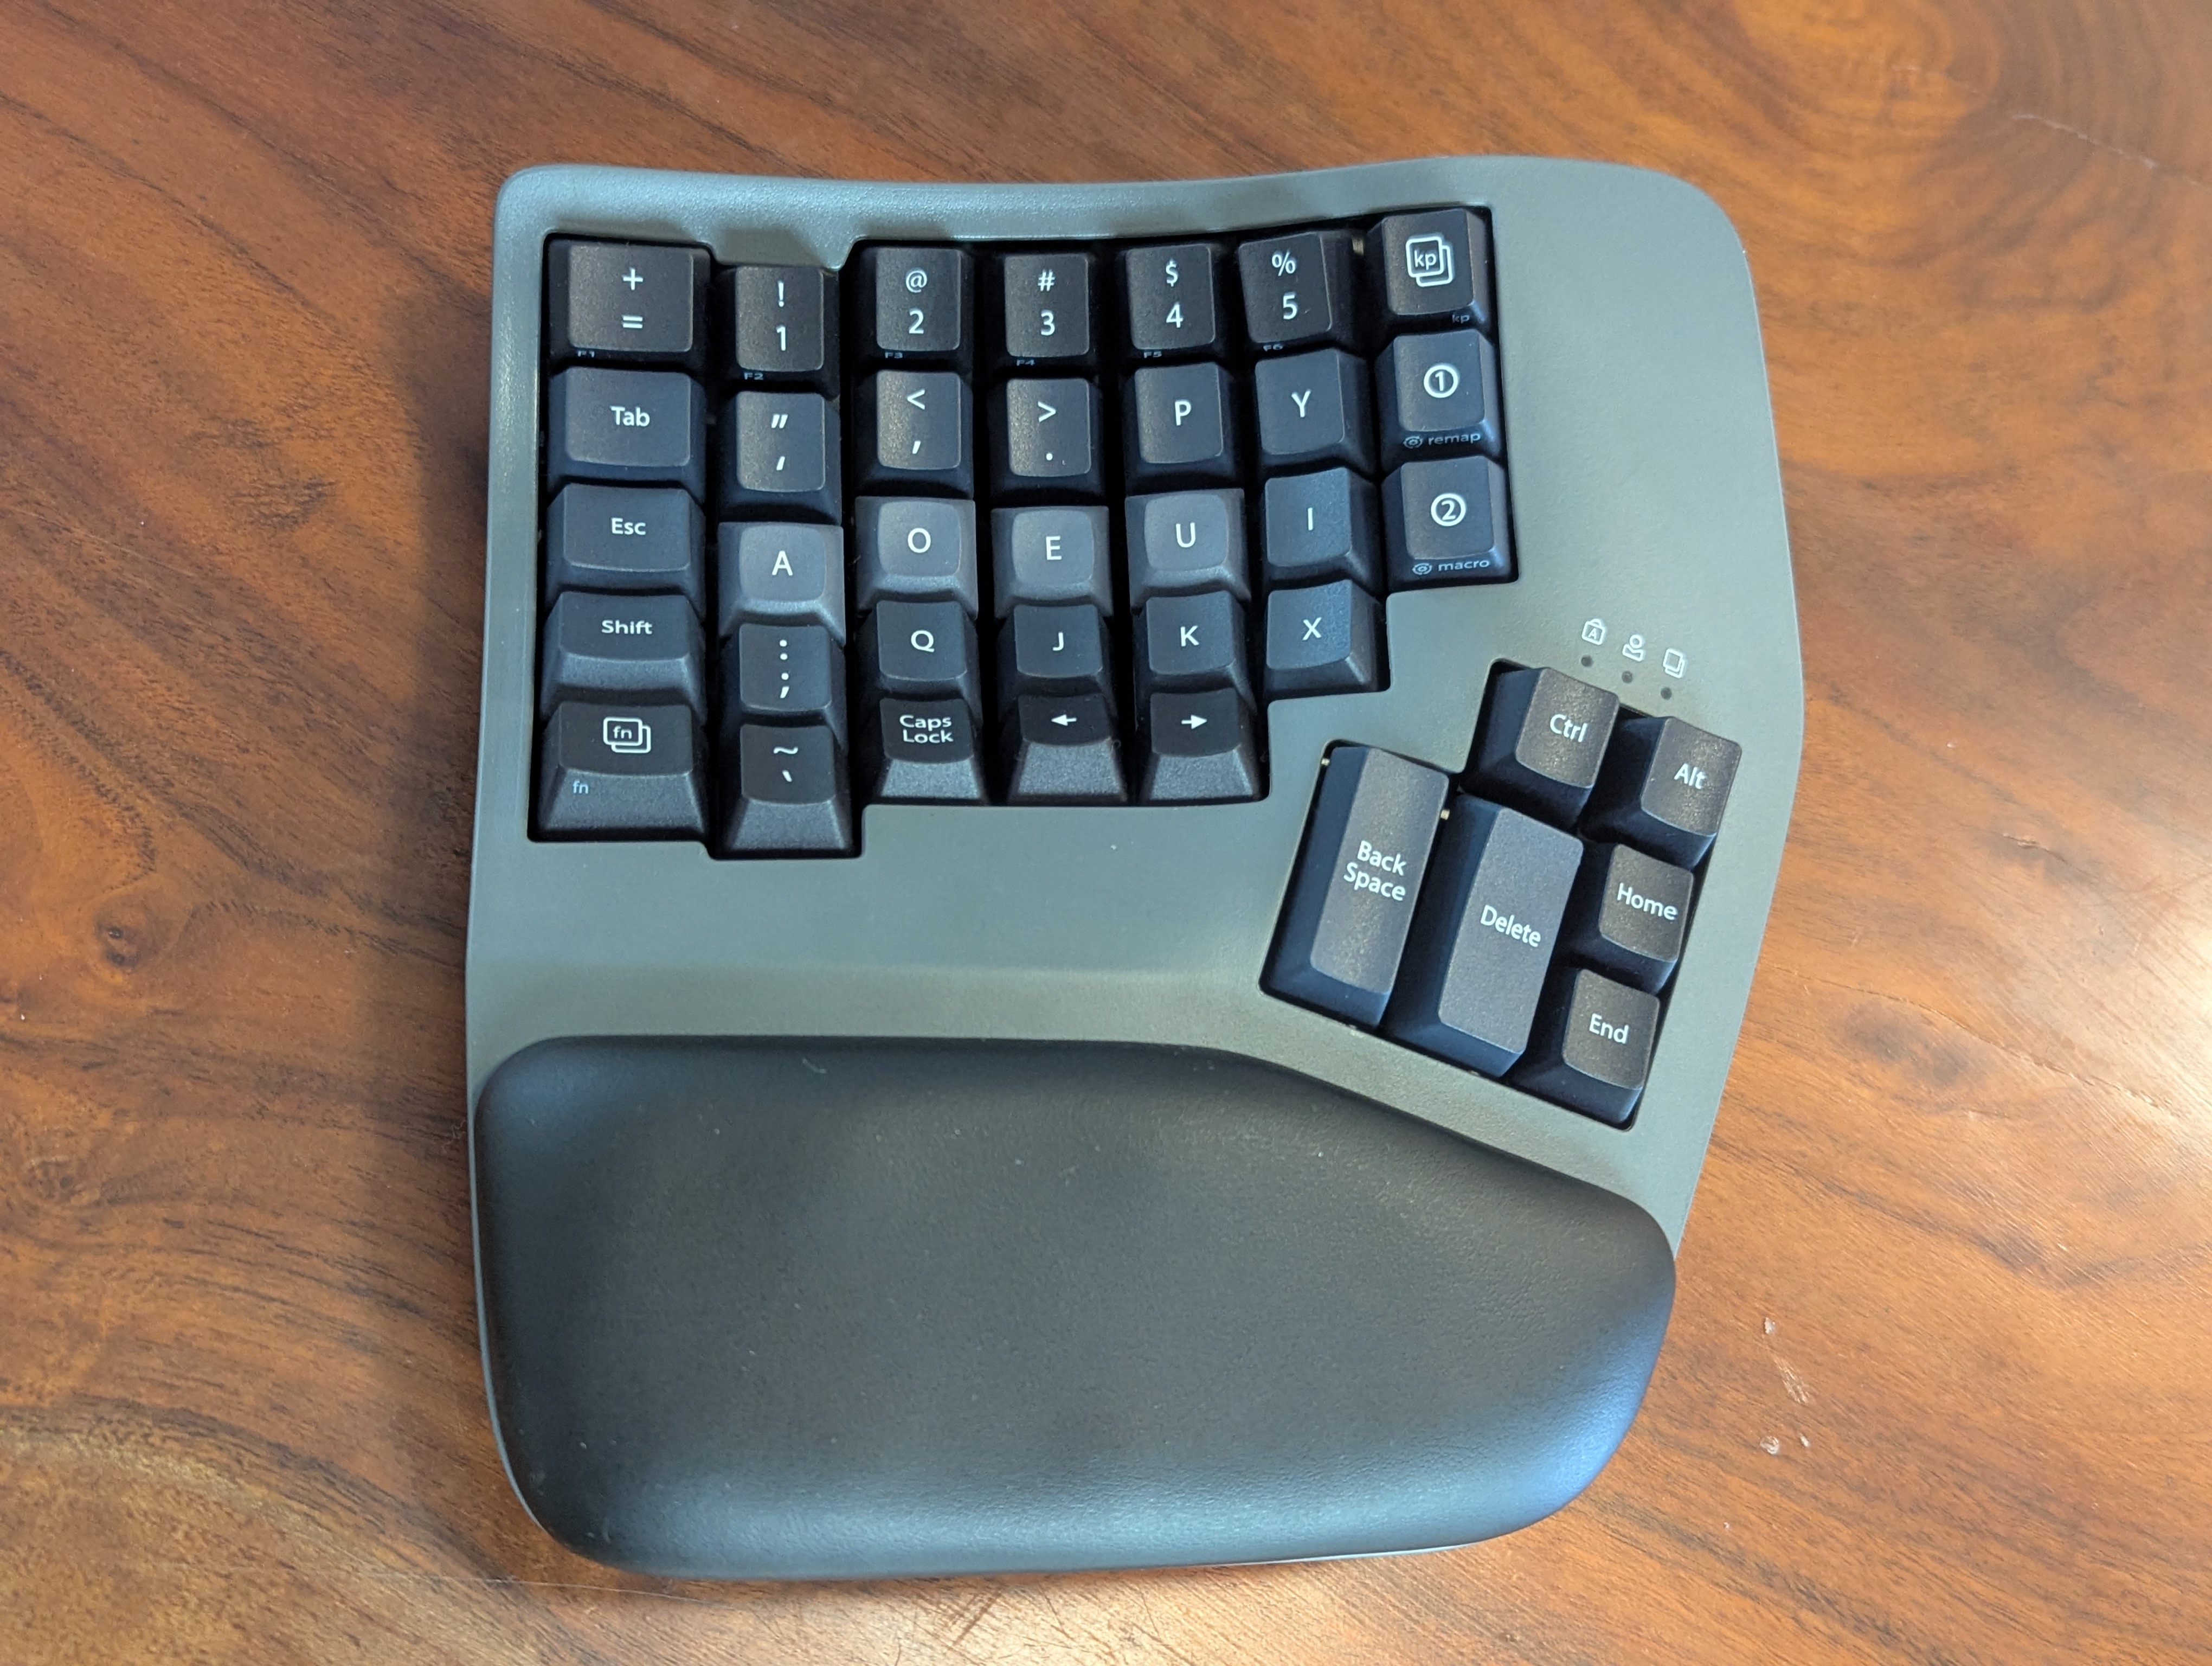
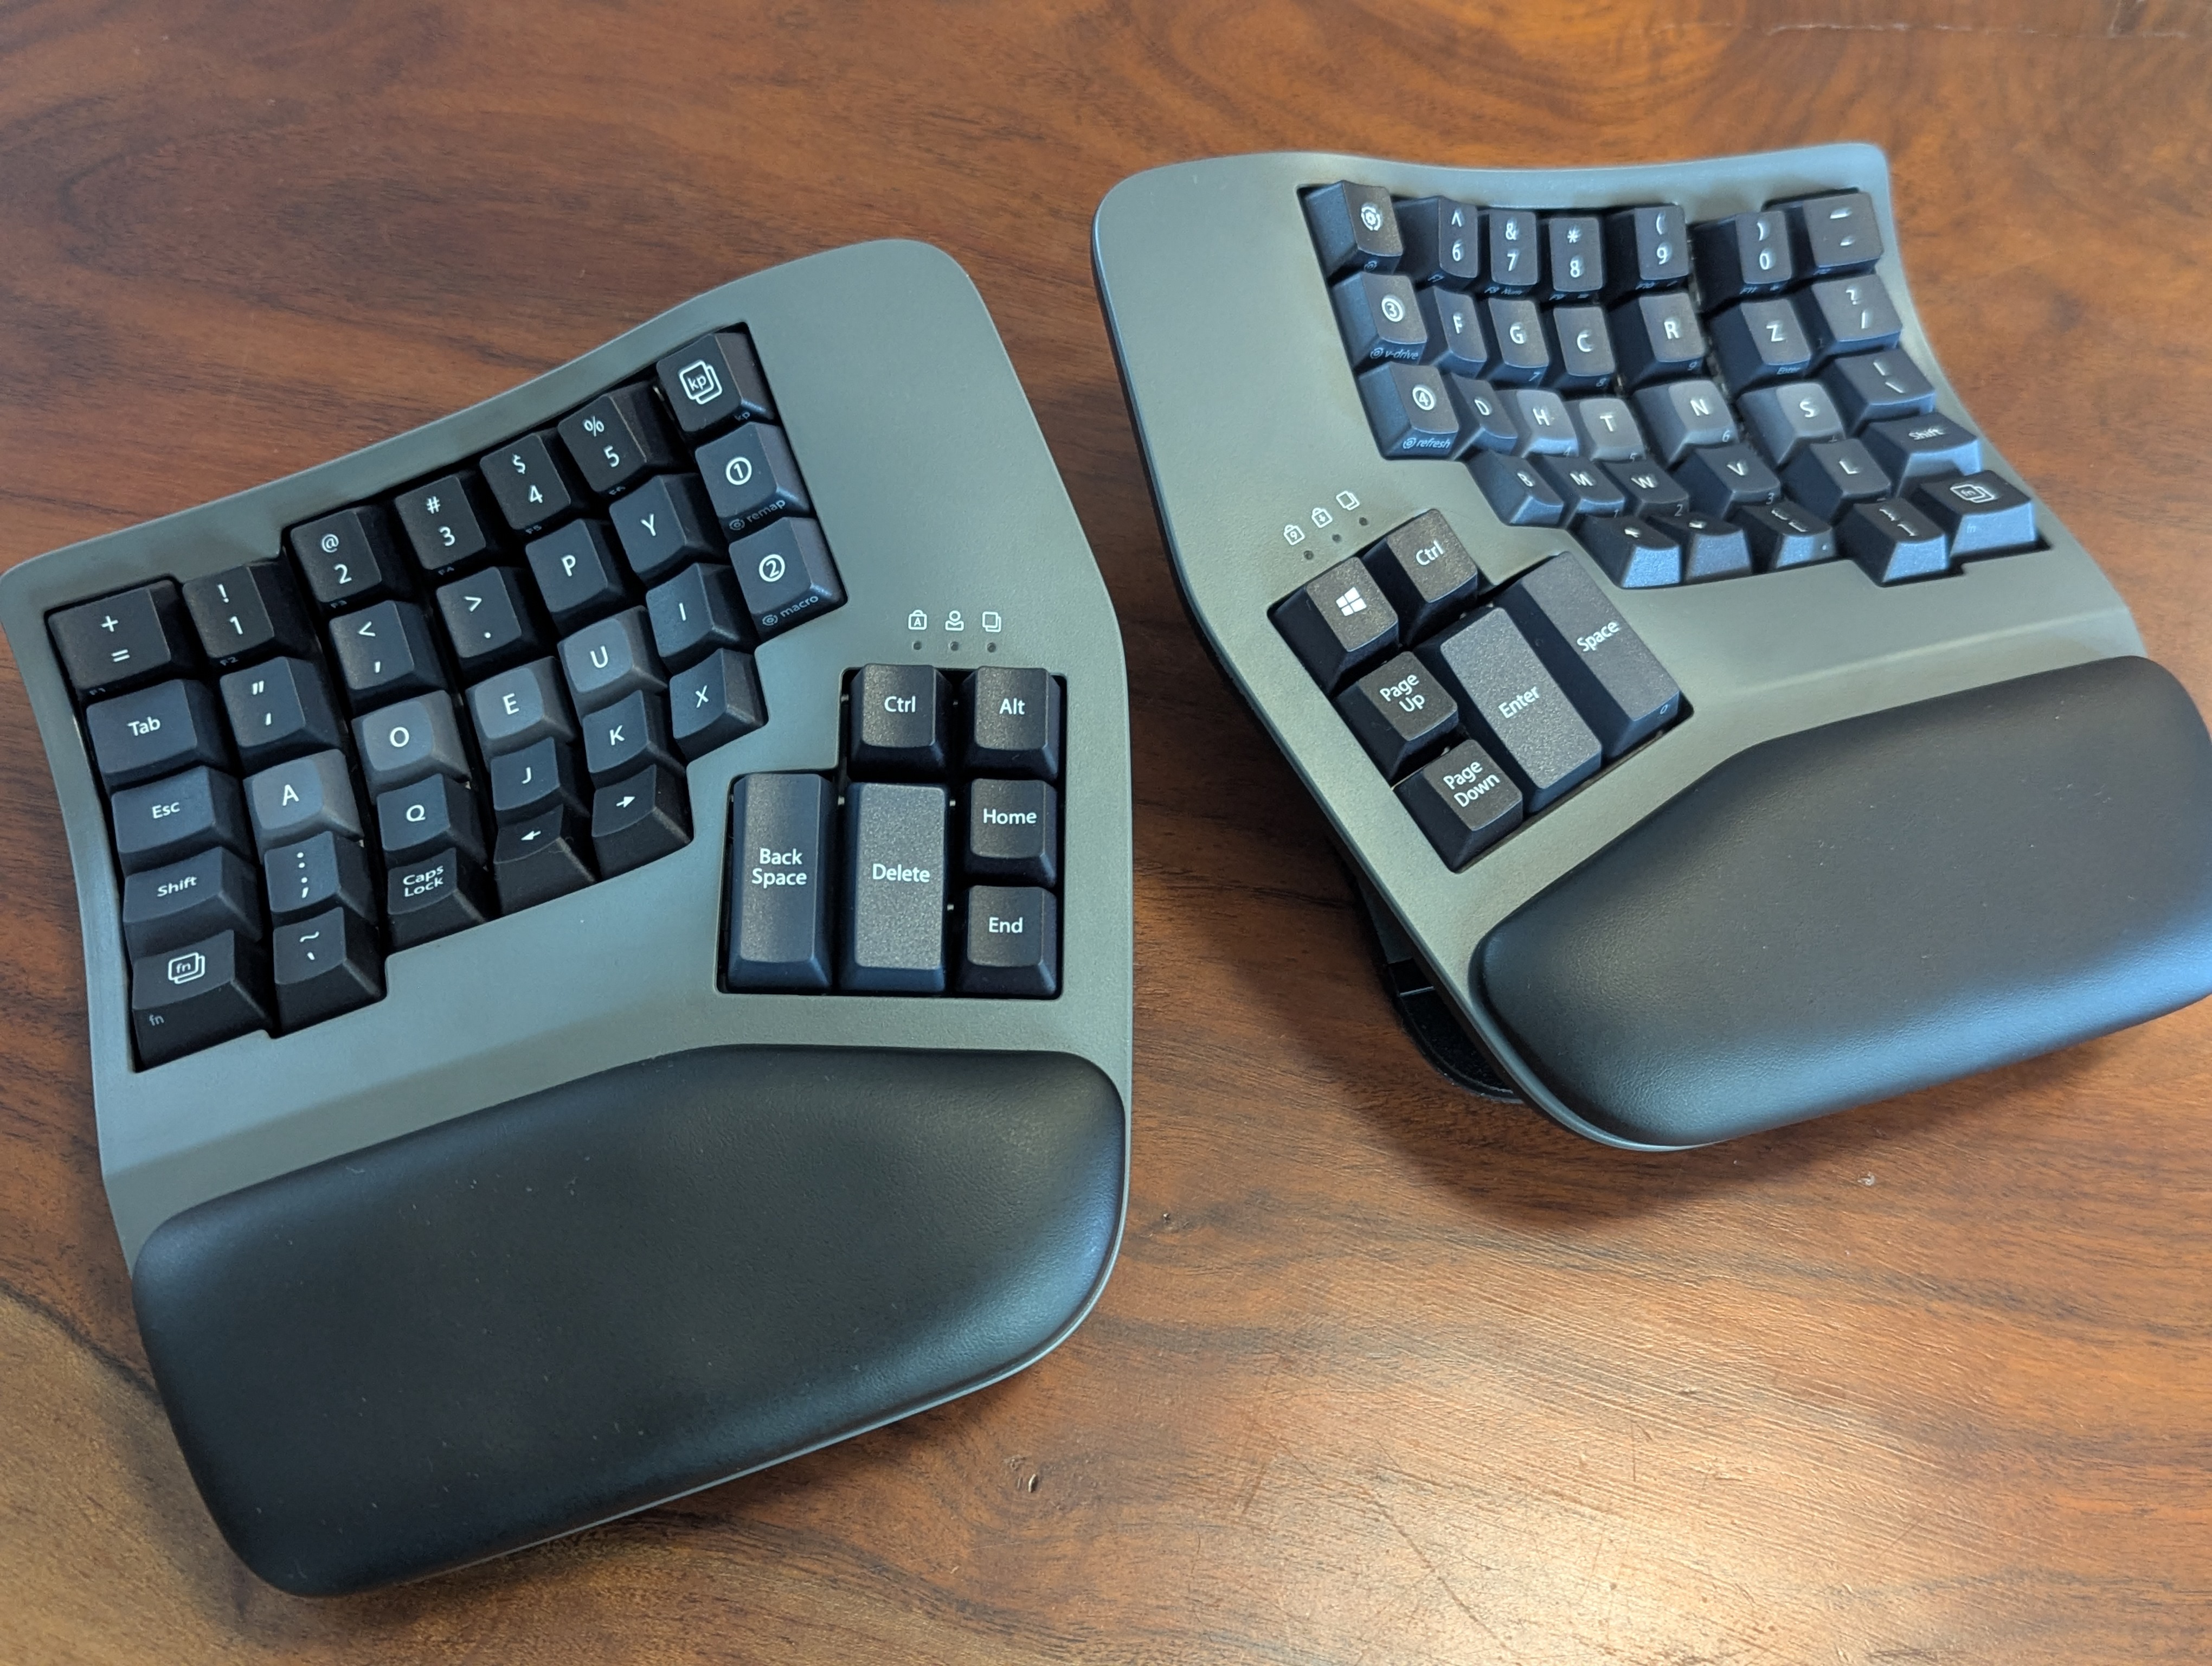
Dvorak Keycaps
The keys on the Advantage keyboards have different angled faces depending on where they are in the layout. Moving Qwerty keys into Dvorak looks and feels awkward. Fortunately, blank and Dvorak keys are available. I swapped in a set of Dvorak keycaps in “Steel Blue”, which are slightly lighter than the stock black keys. Some of the keys (e.g. number row, thumb keys) are identical between Qwerty and Dvorak, so I kept those black. The result is a subtle visual gradient: the frequently used central keys are lighter, while the outer keys remain darker.